Essbase Security: Setting Filters to Groups

For most Essbase applications, user and group security will be a necessity. Here are the steps to set up individual filters and then apply them to a group in Shared Services.

First, create a security filter in Essbase:

Then click on “New” and add read/write access for the filter:

Here is an example of the member specification for filter access:

Next, click Verify and then Save at the bottom of the page.

The next step is to login to Shared Services and create a new group:

The group name should match the filter name to reduce opportunities for confusion. While creating the group, add group/user members:

Next, the group will need to be provisioned for access to the desired application:

For Read/Write access only, assign “Filter” to the group:

For access to run calc scripts on the application along with Read/Write access, assign “Calc” to the group:

The next step is the part that has always been the trickiest piece for me. Right click on the application under Application Groups and select Access Control:

Search for the desired group and move it to the selection window on the right:

Select the desired group and then use the filter & calc dropdowns to select the required filters and/or calc scripts to assign to the group:

Click save after the desired access control for the group has been set. Remember, calc’s can only be assigned if the group was given “Calc” provisioning for the application.

Now the security filter has been successfully assigned to a group in Shared Services.


Recommended Settings for Oracle Hyperion Products

Problem

Oracle has recommended settings for Internet Explorer (IE7, IE8, IE9, IE10 and IE11) when using Hyperion products.  I get this question a lot from my clients, so I thought I would share Oracles suggested settings.  Without changing these, there will be intermittent problems, and frustration points.

Solution

Configure browser to check for new version every time user visits a page

  • Open Internet Explorer
  • Go to Tools > Internet options > General
  • In “Browsing history” section click on “Settings” button and then select “Every time I visit the webpage” option
  • Click OK, then Apply.

Disable default pop-up blocking

  • Open Internet Explorer
  • Go to Tools > Internet options > Privacy tab
  • Uncheck “Turn on Pop-up Blocker”

Add Workspace URL to trusted sites

  • Open Internet Explorer
  • Go to Tools > Internet options > Security tab
  • Select “Trusted sites” from “Select a zone to view or change security settings” window, then click on “Sites” button.
  • Type your workspace URL in form http://workspaceserver:portnumber in “Add this website to the zone”
  • Uncheck “Require server verification (https:) for all sites in this zone”
  • Click Add, then Close.
  • Click OK and Apply.

Customize security settings

  • Open Internet Explorer
  • Go to Tools > Internet options > Security tab
  • Select “Trusted sites” from “Select a zone to view or change security settings” window
  • Select zone containing your Oracle Hyperion servers and click on “Custom level…” button
  • In “Miscellaneous” section enable options “Access data sources across domains” and “Allow script-initiated windows without size or position constraints”
  • In “ActiveX controls and plug-ins” section enable “Run ActiveX controls and plug-ins” and “Script ActiveX controls marked safe for scripting”.
  • Click OK
  • Click Apply, then OK

Enable option “Always allow session cookies”.

  • Open Internet Explorer
  • Go to Tools > Internet options > Privacy Tab > Advanced. Check the “Override automatic cookie handling”, accept the first and third party cookies and check the “Always allow session cookies” option.

Only for SSL enabled environments: Disable option “Do not save Encrypted Pages to Disk”.

  • Open Internet Explorer
  • Go to Tools > Internet options > Advanced Tab. In “Security” section uncheck the option “Do not save Encrypted Pages to Disk”.

Disable option “Enable Native XMLHTTP”. This setting is recommended only for customers using HFM 9.3.1 or older with IE 7. If you are using version 11.1.1.x of EPM products or newer, this option should be enabled.

  • Open Internet Explorer
  • Go to Tools > Internet options > Advanced Tab. In “Security” section uncheck the option “Enable Native XMLHTTP”.

Using Internet Explorer 9 Compatibility View option.

  • Open Internet Explorer
  • For 11.1.2.1.600 Planning and EPMA: Compatibility View should be enabled in Tools > Compatibility View Settings
  • For EPM 11.1.2.2 products: Go to Tools > Compatibility View Settings. Make sure EPM Workspace URL is not enabled for Compatibility View and uncheck all available options at the bottom of the pop-up window.

For products using JRE Plugin (Web Analysis, Performance Scorecard, Administration Services) make sure that a compatible version of plugin is installed on the client machine.

  • Check JRE Plugin certification for your EPM product in support matrix
  • Check installed Java version in Control Panel > Java > General > About. If required update Java version to a supported release.
  • Enable option “Always Auto-Download” in Control Panel > Java > Advanced > JRE Auto-Download=

Using Internet Explorer 11 Enterprise Mode. Limited support with EPM 11.1.2.2.500 and 11.1.2.3.500. For more information see Document 1920566.1.


Batch Scripts: Creating XML files for Runtime Prompts

When automating Business Rules through batch scripts, an XML file is needed to state the runtime prompts. This is how the batch script will know which members to run the business rule for. Is there an easy way to create these files?

Luckily, it is fairly simple to create these XML files and reference them from the batch script. First, to create an XML file directly from a Planning application, go to Tools -> Business Rules:

Once the business rule page opens, use the 2 dropdown menus at the top of the page to narrow down the list of available business rules:

Select the relevant business rule, and click on the launch button on the right side of the window. In this example, I want to create an XML file for the business rule, “CurrConvAdmin”:

This rule has 3 runtime prompts (Scenario, Year, & Version). Select the 3 members for the prompts and click “Create runtime prompt values file” in the bottom right of the pop-up window:

The following screen will appear, confirming that the file was created successfully:

Now, we need to go and find where the XML file was saved so that we can reference it in our batch file. From the Foundation server (or the server that Planning is on), go to the following path:

D:\Oracle\Middleware\user_projectsoundation1\Planning\planning1\RTP

All of the XML files will be created under your username within the RTP folder:

Right click to edit the file, and notice that all 3 runtime prompts are accounted for in the file:

In the batch command itself, the XML file is referenced as follows:

Here is the default syntax for referencing a business rule via batch scripts:

CalcMgrCmdLineLauncher.cmd [-f:passwordFile] /A:appname /U:username /D:database [/R:business rule name | /S:business ruleset name] /F:runtime prompts file [/validate]

And here is the full documentation on the business rule syntax from Oracle: http://docs.oracle.com/cd/E1723601/epm.1112/hpadmin/frameset.htm?ch06s09s05.html

I’ve noticed that it is best to create the XML files directly from Planning, rather than trying to create them manually. When manually created, the batch command won’t always recognize the format of the XML file, even if it looks the same to what is created via Planning. It only takes a couple of extra minutes, but will save you from some headaches down the line.


Calc Manager: Fixing Corrupt Rules & Rulesets

I was recently testing out the performance of rulesets that were attached to forms, and ran into an issue that had me scratching my head. Certain rulesets were not running or even appearing on forms that they were attached to in the Planning application. Turns out, the rules had been corrupted in the transfer between Calc Manager and the Planning application

The issue first appeared when looking at a Planning form. Prior to the testing, I had attached a ruleset to the Brokerage and Commission form. However, when looking at the form, the ruleset was nowhere to be found:

However, with a little digging, I was able to verify that there is indeed a ruleset attached to the form:

So, where is the breakdown happening?

From the Planning application, let’s take a look at the Business Rules to see if we can gather any more information:

Notice that some of the rulesets say “None” instead of displaying the play button. Broke_Comm, our missing ruleset, is displaying “None”:

It looks like we found the issue. These rules have been corrupted and will not launch in the Planning application. That would explain why we were not seeing the rulesets on the forms. Some maintenance is required to get the rules back up and running. Here are the steps I took to fix the issue:

Open up Calc Manager and select deployment view:

Expand the “To Be Deployed” folder and uncheck all of the rules (this list of rules should match up with the corrupted rules – rules displaying “None” in the Launch column – from the Planning app):

Right click on the application in deployment view and select Deploy:

In Planning, verify that there are no longer any non-launchable rules:

Next, head back to Calc Manager and check all of the rules that are under the “To Be Deployed” folder. Right click on the application and deploy. Navigate back to the Business Rules tab in the Planning application, where all of the rules should now be launchable:

Looking back at the Brokerage Commission form, the Ruleset that is attached is now displayed:

Note: This works most of the time, but sometimes following the above steps will not bring back all of the corrupted rules/rulesets. When this happens, I’ve found that the easiest solution is to:

  1. Take an LCM backup of Calc Manager in Shared Services
  2. Delete the rules that are corrupt
  3. Import the rules from the backup that was just taken
  4. Navigate to Calc Manager->Deployment View and Deploy all of the newly imported rules

This second option might take a little bit longer than the first solution outlined, but it will clean up your rules/rulesets and get them back to performing as expected.


Building A Planning Application Using EPMA (11.1.2.3)

This post covers the basics of building a Planning app. Building a Planning application can be a straightforward process; however, there are some pitfalls to watch out for. One or two mistakes can lead to some major headaches in trying to decipher what went wrong. Whether a beginner or a seasoned vet looking for a quick refresher, this guide will outline the steps necessary to successfully create/deploy a Planning application.

First, open up the dimension library, and then click File, New, and Application. This will take you to the first screen in the Application setup: Application Type


A. Application Type

There are 3 sections that make up the first screen

  • Application Information
  • Planning
  • Calendar

We will tackle them one at a time…

Application Information:

  1. In this first section, give a name for your application, as well as select Planning from the type dropdown. Giving the application a description is optional
  2. Since we are creating an application using dimensions from the EPMA library, leave “Create Blank Application” & “Auto Create Local Dimensions” unchecked

Planning:

  1. Select the application type (typically this will be General), and select the default currency for the application. You can select “Use Multiple Currencies” but this is not the most effective way of going about it. For more detailed insight on the utilization of multiple currencies in a Planning app, check out the following article:
  2. Select and name the Plan Types that will be in the application. From the screenshot below, the application will have 3 plan types (Plan1, Plan2, Plan3)


Calendar:

  1. Monthly, Quarterly, and Yearly application setup.
    • Base Time Period: This can be 12 months, Quarters, or Custom (if you need a lower level of detail such as weeks)
    • Fiscal Year First Month/Fiscal Year Start Date: Set the first month of the fiscal year as well as if it is the same calendar year or the previous calendar year
    • Weekly Distribution: There are 4 options from this dropdown (Even, 445, 454, 544)
  2. CAUTION: For the following section, both the Period and Year dimensions should be renamed to “Periods” & “Years” if Dynamic Time Series is going be turned on for the application (M-T-D, Q-T-D, Y-T-D, etc). If the dimensions are named Year and Period, Planning will not be able to differentiate between the dimensions and the dynamic time series members, causing errors.
  3. Name the dimension “Years” and select the first fiscal year/number of fiscal years. The number of years ranges from 1-100.

After completing all of the above settings, click next to move on to the next screen, Dimension Selection:


B. Dimension Selection

This screen will have sections for the required, custom, as well as other dimensions for the application. First, the screen will auto populate whatever dimensions are already in the EPMA library. In this example, Entity, Account, and Alias are already filled in. The remaining dimensions (Version & Scenario) need to be populated via the dropdown menu:

These dimensions will be added as local dimensions to the application. Give the dimensions a name and make sure that the type matches the dimension that is being updated:

After setting the required dimensions, the custom dimensions can be selected in the next section. By clicking on the “[Select]” dropdown, the rest of the dimensions from EPMA will be available for selection in the application (note: your dropdown menu will not display the same selection as in this screenshot, as these dimensions had to be created in the Shared Library first):

If there are any Attributes, Smart Lists, or UDA’s that need to be added, the “Other Dimensions” section is the place to do that. Notice that there are 3 different Attributes to choose from in our Test application (I created these in the Shared Library beforehand as an example).

Reviewing the dimensions, there are 4 new local dimensions (Version, Scenario, Years, & Periods), 3 custom dimensions (Customer, Product, & BusinessUnit), & 3 other dimensions (Attribute, SmartList, & UDA). Click Next to go to the Application Settings screen.


C. Application Settings

  1. The entire dimensionality of the new application is available to view/edit. Exclude/add members to the hierarchy as necessary. Make sure that all the dimensions are accounted for.
  2. Properties of the application: This is a review of the application settings from the first screen. Double check that base time period, fiscal start year, and fiscal year first month are set. Also, make sure that the default alias table is set.

After making those changes, click Validate. A list of errors and warnings will populate below. These errors and warnings need to be taken care of before clicking Finish. There are a wide variety of errors that may be encountered such as duplicate members, duplicate aliases, invalid members, invalid plan types, etc. depending on your application. After fixing an error, click validate again and the error will disappear from the list.

Once there are no more errors, the application is ready to be deployed. Click Finish and go to the Application Library and right click, then deploy the application.


Navigating Misaligned Menus in Workspace with IE8


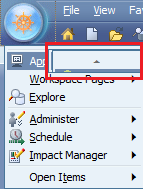
If you have recently upgraded your web browser to IE8 and attempted to use Hyperion Workspace, you’ve likely encountered difficulty in navigating the interface. When a user clicks on the wheel in the upper left hand corner, selects “Applications,” they can’t see the menu as it apearrs to be condensed. 


This issue can be quickly resolved by making a browser modification to the IE security. It is best to run this settings change past your IT department to ensure it will not open holes in your company’s security profile.


To correct this issue, 


1.       Open IE8


2. 

3.       Select the “Security” tab and “Custom Level”.


4.       You will have 4 zones where security changes can be performed (Internet, Local Internet, Trusted sites, Restricted sites). The change can be made to each of these 4 zones if necessary, but it’s possible only one zone needs modified. Test the combination that works for your environment and fits your companies IT/security profile.


5.       Select the “Internet” zone and scroll down the menu of options to find “Allow script-initiated windows without size or position constraints”. This will likely be set to “Disable”… select “Enable” and click “OK”. (If prompted, accept the change just made to the zone security).


6.       Select “OK” from the security tab to finalize the modification.


7.       Test the modification to verify the change worked as intended. As noted above, you might need to enable this setting on multiple zones in order for the setting to take effect.


Why Does Workspace Log You Out?

Many clients have issues with Workspace logging users out when attempting to open/export certain types of documents. For example, a user logged into Hyperion Workspace attempts to open a Supporting Detail document, only to be prompted with a logout warning message before the document opens. The same can happen when a user attempts to export an FR report file (.DES file) from Workspace. After being logged out of Workspace, the user is able to log back into the application and open/export the necessary document. This issue can easily fixed by adjusting a few browser settings as shown below.

NOTE: Microsoft documents typically cause this logout issue (Excel, Word, PowerPoint).

1. Open your web browser (This blog entry will assume IE).

2. Select “Tools” -> “Internet Options…” from the menu bar.

3. Select the “Internet” option inside the “Security” tab. Select “Custom Level…”.

4. Navigate to the “Downloads” section and “Enable” Automatic prompting for file downloads. Click “OK”.


5. Now select the “Local Internet” option inside the “Security” tab. Select “Custom Level…”.


6. Navigate to the “Downloads” section and “Enable” Automatic prompting for file downloads. Click “OK”.


7. Finally, select the “Trusted sites” option inside the “Security” tab. Select “Custom Level…”.


8. Navigate to the “Downloads” section and “Enable” Automatic prompting for file downloads. Click “OK”.

9. Now that the settings have been set properly, Click “OK” on the “Internet Options” dialog box.

10. Close and re-open your web browser for the settings to take effect. Test these settings by logging into Workspace and opening a Supporting Detail document.


Managing Virtual Machines

Many developers that work with Hyperion products, as well as many any other software product, use virtual machines.  Virtual machines are an easy way to create multiple environments for testing and developing multiple product versions

The 3 main applications to create and use virtual machines are

I have used all 3.  Opinions can be found that promote all 3.  Many IT professionals prefer VMWare.  I have found it to be a little cumbersome to use, and find sharing virtual machines to be a frustrating experience.  I am not a stereotypical IT professional, but rather a business person with an aptitide for technology.  That said, I prefer VirtualBox.  For me, VirtualBox is easier to install and manage the virtual machines.  It is easy to move virtual hard drives to another computer, simple to duplicate a virtual hard drive and allows users to take snapshots, which allows, for lack of a better explanation, a huge undo if required.

Through my VirtualBox travels, I have found the following knowledge to be very valuable.  Here are some HOW TOs that might be useful if you decide to use Sun’s VirtualBox.

How to reduce the size of a virtual machine
The use of virtual machines (just like any system) cause fragmentation and the size of the virtual hard drive to grow, sometimes substantially.  Managing the size of the virtual machine is relatively easy, and is not time consuming.  It involves 3 actions (defrag, delete free space, and compact the virtual hard drive).  Here is one way to accomplish reducing the size of your virtual machine / virtual hard drive.

  1. Open the virtual machine that needs compressed
  2. Download sDelete, and extract the sDelete.exe to c:\
  3. NOT REQUIRED:  Download and install Smart Defrag – this is a free disk defrag tool that I have found to be more effective than the one that comes with the Windows OS.
  4. Use the disk defrag tool that comes with Windows or the one above, and defragment the hard drive.
  5. Go to Start/Run, and enter “c:\sdelete.exe -c”
  6. Shut Down the OS on the virtual machine
  7. On the host computer, open a command window (Start/Run, and enter cmd)
  8. If VirtualBox was installed in the default location, change the directory to the VirtualBox directory by entering “cd C:\Program Files\Sun\xVM VirtualBox\”
  9. Enter “VBoxManage modifyvdi HardDrivePathAndName compact” where HardDrivePathAndName is the full path to the hard drive the virtual machine is using.

If the virtual machine/hard drive has free space, this process will find it and reduce the overall size of your virtual machine/hard drive.

How to duplicating, or clone, a hard drive
Often times there is a need to replicate a virtual machine on the same host environment.  Copying the file doesn’t do the trick, as every virtual machine’s hard disk must have a unique key.  VirtualBox comes with a tool to duplicate the hard drive and assign it a new key.  To accompolish, follow the following steps.

  1. Reduce the hard drive size (see previous topic)
  2. On the host computer, open a command window (Start/Run, and enter cmd)
  3. If VirtualBox was installed in the default location, change the directory to the VirtualBox directory by entering “cd C:\Program Files\Sun\xVM VirtualBox\”
  4. Enter “VBoxManage clonevdi Source Destination” where Source is the full path to the hard drive the virtual machine to duplicate and Destination is the location of the new virtual machine hard drive.
  5. Open VirtualBox and create a new virtual machine that points to the newly created hard drive in the previous step.