Upgrade Or Downgrade To Or From Hybrid In The Cloud

There are benefits to moving to Hybrid, but there are also some challenges.  The content of this post is not around the pros and cons, but the fact that you can upgrade your environment to use it.  If you find it isn’t for you, you can “downgrade” back to BSO.  The flexibility provides everybody the ability to try it.


Recreate Introduction

EPMAutomate comes with a function that allows the ability to restore an environment to a clean slate.  I don’t think this is new to anybody that has used EPMAutomate or EPM Cloud Planning.  What might be a surprise is that it does more than just reset an environment so you can start over.  It can also:

  1. Change the type of Essbase database to Hybrid or a standard BSO.
  2. Temporarily convert a Planning, Enterprise Planning, Tax Reporting, or Financial Consolidation and Close environment to an Account Reconciliation, Oracle Enterprise Data Management Cloud, or Profitability and Cost Management environment.

Using Recreate

The usage of the Recreate command is as follows, which all options.

 epmautomate recreate [-f] [removeAll=true|false] [EssbaseChange=Upgrade|Downgrade] [TempServiceType=Service_type]
  • -f forces the re-create process to start without user confirmation. If you do not use the -f option, EPM Automate prompts you to confirm your action. Be careful using this option.  If you have a long day and aren’t focused, this can make the day a whole lot worse!
  • removeAll, removes all of the existing snapshots, as well as the content of the inbox and outbox.  The default is false, meaning it retains the snapshots and the content of inbox and outbox and nothing is removed.
  • EssbaseChange upgrades or downgrades the current Essbase version in legacy Oracle Financial Consolidation and Close Cloud, Oracle Enterprise Planning and Budgeting Cloud or Planning and Budgeting Cloud Plus 1 environments.
  • TempServiceType temporarily converts an environment to a different service environment.

Changing Your Essbase Version

To change your environment to BSO from Hybrid

epmautomate recreate EssbaseChange downgrade

To change your environment to Hybrid from BSO

epmautomate recreate EssbaseChange upgrade

Trying A Different Service

There are some details that must be understood to use this option and is dependent on the version of the cloud service you have.  For subscriptions other than EPM Standard Cloud Service and EPM Enterprise Cloud Service, meaning PBCS and EPBCS, you can use this option to convert, temporarily, to

  • Account Reconciliation
  • Oracle Enterprise Data Management Cloud
  • Profitability and Cost Management environment

To use this option to convert your environment to something it wasn’t originally intended for:

epmautomate recreate -f removeAll=true TempServiceType=ARCS

To change your environment back to its original service:

epmautomate recreate

For EPM Standard Cloud Service and EPM Enterprise Cloud Service subscriptions, you can use this option to convert to any supported EPM Cloud service.  EPM Enterprise Cloud Service subscriptions use a common EPM Cloud platform. Initially, you can deploy any supported EPM Cloud business process. 

To switch from a deployed business process to another, you must re-create the environment to delete the current deployment and to bring it back to the original EPM Cloud platform. You then re-create it again as the new service type.

For example, if you created an Account Reconciliation business process but now want to create an Oracle Enterprise Data Management Cloud environment, you must run the re-create command twice.

First, reset the service.

epmautomate recreate -f removeAll=true

Second, change the service type.

epmautomate recreate -f TempServiceType=EDMCS

The acceptable service types, currenty, are

  • ARCS (Account Reconciliation)
  • EDMCS (Oracle Enterprise Data Management Cloud)
  • EPRCS (Narrative Reporting)
  • PCMCS (Profitability and Cost Management)

That’s A Wrap

It is great that Oracle allows us to do these things. We have a ton of flexibility, not normally afforded to us in the cloud, to test and use different core database types.  It also allows those using the old SKU to try the new services, or business processes, to see if they might be something you want to purchase. 

If you want to give Hybrid a try, use your test environment and give it a spin.  If you want to get exposed to one of the other business processes, you now have the ability to see it without jumping through hoops.


Hybrid Planning / Essbase Gotchas

Having the best of both worlds, ASO and BSO, doesn’t come without some gotchas.  Before you jump in with both feet, beware of some things that are not supported in hybrid.  As of Friday, May 22, 2020, @ISMBR in planning does NOT work. I don’t know if this is a bug, but it is not documented as a function that doesn’t exist.  What is documented is the following.  There isn’t a ton in this post, but I thought it would be beneficial to share this as a warning, as well as an easy way to find the list. If you find more things that don’t work, please share with the community.

  • @ACCUM
  • @ALLOCATE
  • @ANCEST
  • @ANCESTVAL
  • @AVGRANGE
  • @COMPOUND
  • @COMPOUNDGROWTH
  • @CORRELATION
  • @CREATEBLOCK
  • @CURRMBR
  • @CURRMBRRANGE
  • @DECLINE
  • @DISCOUNT
  • @GROWTH
  • @INTEREST
  • @IRR
  • @IRREX
  • @MDALLOCATE
  • @MDANCESTVAL
  • @MDPARENTVAL
  • @MDSHIFT
  • @MEMBER
  • @MOVAVG
  • @MOVMAX
  • @MOVMED
  • @MOVMIN
  • @MOVSUM
  • @MOVSUMX
  • @NPV
  • @PARENT
  • @PARENTVAL
  • @PTD
  • @SANCESTVAL
  • @SHIFT
  • @SLN
  • @SPLINE
  • @STDEV
  • @STDEVP
  • @STDEVRANGE
  • @SYD
  • @TREND
  • @XRANGE
  • @XREF
  • @XWRITE


Essbase Security: Setting Filters to Groups

For most Essbase applications, user and group security will be a necessity. Here are the steps to set up individual filters and then apply them to a group in Shared Services.

First, create a security filter in Essbase:

Then click on “New” and add read/write access for the filter:

Here is an example of the member specification for filter access:

Next, click Verify and then Save at the bottom of the page.

The next step is to login to Shared Services and create a new group:

The group name should match the filter name to reduce opportunities for confusion. While creating the group, add group/user members:

Next, the group will need to be provisioned for access to the desired application:

For Read/Write access only, assign “Filter” to the group:

For access to run calc scripts on the application along with Read/Write access, assign “Calc” to the group:

The next step is the part that has always been the trickiest piece for me. Right click on the application under Application Groups and select Access Control:

Search for the desired group and move it to the selection window on the right:

Select the desired group and then use the filter & calc dropdowns to select the required filters and/or calc scripts to assign to the group:

Click save after the desired access control for the group has been set. Remember, calc’s can only be assigned if the group was given “Calc” provisioning for the application.

Now the security filter has been successfully assigned to a group in Shared Services.


BUG REPORT – Shared Members Security in EPMA

Oracle has confirmed a bug related to the deployment of security with a planning application maintained in EPMA in version 11.1.2.x.  When the Shared Members checkbox is selected in an EPMA deployment of a Planning application, it ignores this option.  Even if the Shared Members box is checked, the user still only gets access to Ohio Region, and not the children, in the example below.   Oracle is currently working on a patch.

What Does Checking Shared Members Do?

By default, any member that is a shared member under a parent with security, it gets excluded.  For example, if the security for Ohio Region is set to @IDESCENDANTS with READ access, the three members below Ohio Region would have no access.
– Ohio Region
– Columbus (Shared)
– Cincinnati (Shared)
– Cleveland (Shared)

The filter that gets pushed to Essbase would look something like this.

@REMOVE(@IDESCENDANTS(“Ohio Region”),@SHARE(@IDESCENDANTS(“Ohio Region”)))

When the shared members are checked, it tells Hyperion that you want to include shared members in the security.  The same example above, with shared members selected, would give users access to all 3 members.  The filter that gets pushed to Essbase would then look like this.

@IDESCENDANTS(“Ohio Region”)

The Workaround

The workaround for this is to deploy the hierarchies from EPMA, and Refresh the database (security only) with Shared Members selected from Hyperion Planning.

When a patch is released, we will release the details.


Increased Efficiency Utilizing Saved Objects in Financial Reporting

All developers understand the power of using objects during development activities, a concept that can be leveraged in the development of Oracle/Hyperion Financial Reports. Utilizing saved objects allows the development team to deliver a product in less time and provides the ability to quickly react to future report modifications. The information below (1) provides common saved object examples and (2) displays how saved objects are created and used.

What type of report information should be converted into saved objects?

The goal behind utilizing saved objects is to avoid the recreation of code, thus I find it valuable to turn all report header and footer information into saved objects. Items such as company logo’s, report title/sub-tile information, dimensional point-of-view selections, date & time stamps, page numbers and data source information make for great saved objects as they typically reside on all financial or management reports.

The usefulness of report objects may seem less important during the early stages of development, but as your reporting repository grows, their impact becomes increasingly important. For example, changing a company logo on a few reports is a minor incontinence, but making that same change to 50 reports could take hours to complete, resulting in the inefficient use of development/ maintenance time.

How are saved objects created and used?

Creating saved objects is a simple process that requires one additional step after the initial creation of your object. The example below walks through the process of creating a report title saved object. The same process will be used in the creation of all reporting saved objects.

Step 1 – Create your Object:


Step 2 – Save the Object:

Right-click the object and select Save Object…

Best practice involves the creation of a Saved Object folder in the report repository where all saved objects will reside. Notice the use of this folder below.

IMPORTANT – Be sure to place a checkmark next to “Link to Source Object”. This link enables future modifications of this object to resonate across all reports where this object exists. This checkbox allows for the increased efficiency when developing and maintaining reports.

Once the report has been saved, notice the object name changes.


Step 3 – Use your Saved Object:

Once the object has been saved you can reference it in future report development via the link. Create a new report and insert the saved object.


Be sure to select the Type of “Text” (It will always default to Grid) and place a checkmark next to “Link to Source Object”. 

FYI: When inserting saved objects you have 4 choices (Grid, Text, Image and Chart). Be sure to select the correct type in order to locate the desired saved object.

Note that when saved objects are inserted, they are placed in the body of the report by default; the developer will need to place the saved object in the correct position on the report.


What’s New in Hyperion EPMA 11.1.2?

What’s New in Hyperion 11.1.2?

EPMA

The release of version 11.1.2 has brought a plethora of improvements to the entire Hyperion suite of products, and EPMA is no different. This post will cover some of the significant changes that were included.

Improved Support for Essbase

This release has provided several updates that increase the functionality of EPMA as it relates to Essbase. Some of the more important ones include:
  1. Utilizing the Reorder Children dialog box, a new sort order can now be created to reorder members in the hierarchy.
  2. Performance settings for dimensions can now be modified in EPMA
  3. Dynamic Time Series (DTS) is now supported on the period dimension (BSO cubes)
  4. The ability to add Typed Measures and members with a Date Format has also been included.
    1. Varying Attributes are still not supported in this release

Application Troubleshooting Support

As we all know, EPMA can occasionally become out of sync with the dimension library or one of the products to which we are trying to push metadata. A new application diagnostic feature has been added in this release to help users fix this issue. This diagnostic tool determines inconsistencies between the source and target. Once the inconsistencies have been discovered, they can either be corrected manually or dealt with automatically.

Financial Management Copy Application Utility

HFM supports the ability to copy an EPMA app using the Copy Application Utility. This can be done two different ways:
  1. Select the Financial Management app. It will then be copied as a Classic application. Once this has been done, the EPMA upgrade feature can be uses
  2. Alternatively, the LCM tool can be used to migrate the application. Once this is done, the Copy Application Utility can be utilized to move the data.

Batch Client

 This release includes a couple of adjustments to the batch client that improve the automation process.
  1. Login through a proxy is now supported
  2. Single Sign On (SSO) login is also supported
Follow the link below to view the complete document of changes

Oracle EPMA Documentation


Learning Life Cycle Management (LCM): Command Line Security Synchronization

This purpose of this article is to introduce the command line Life Cycle Management(LCM) utility in Oracle EPM. The LCM tool can be used to export and import objects that can be found within the Oracle EPM Environment.   This includes Security, Essbase, Hyperion Planning, Financial Management … etc.  As once gets more familiar with LCM, one comes to realize how powerful the tool is and how empty life without LCM was. Without LCM some of the more detailed artifacts within an application were difficult to move between environments.  LCM provides a centralized mechanism for exporting and importing nearly all of the objects within an Oracle EPM application or module. The table below is listed to get an idea of all the facets of LCM.


Application Artifacts by Module

Module Artifacts
Shared Services User and Group Provisioning
Projects/Application Metadata
Essbase Files (.csc, .rpt, .otl, .rul)
Data
Filters
Partitions
Index and Page files (drive letters)
Application and Database properties
Security
EAS/Business Rules Rules
Locations
Sequences
Projects
Security
Hyperion Planning Forms
Dimensions
Application Properties
Security
Hyperion Financial Management Metadata
Data
Journals
Forms/Grids
Rules
Lists
Security
Financial Data Quality Management Maps
Security
Data
Metadata
Scripts
Security
Reporting and Analysis (Workspace) Reports
Files
Database Connections
Security


The LCM tool is integrated into the Shared Services Web Interface.  If can be found under the Application Groups tab. Within the application groups there are three main areas of interest:

  1. Foundation – includes Shared Services security such as Users/Groups and Provisioning.
  2. File System – This is where the exported files will go by default. The default location is to be stored server side, on the Shared Services server in the location: E:\Hyperion\common\import_export
    Under this main folder, the contents are broken out by the user account that performed the export. Within the export folder, there is an “info” folder and a “resource” folder. The info folder provides an xml listing of the artifacts contained within the export. The resource folder contains the actual objects that were exported.

    The LCM Command line tool provides more flexibility because it can be installed on any machine and the results can be directed to output to any local folder. Sometimes this is very useful if the Shared Services node is a Unix machine, and the LCM users are unfamiliar with Unix. Simply install the LCM Command Line Utility on the Windows machine and redirect its output to a local Windows folder using the –local command line option.

  3. Products and Applications – Each registered product will be listed and provide a mechanism to export and import the respective objects for the associated applications, Essbase, Planning…etc.


Going Command Line

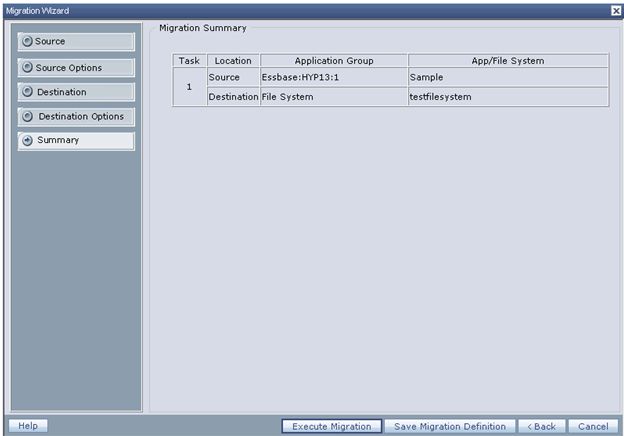
The Shared Services LCM GUI is a great way to become familiar with the LCM tool. However, when it is time to start automating LCM tasks and debugging issues, the Command Line LCM utility is very helpful. To get started, the LCM Command Line tool requires a single command line argument, an xml file that contains the migration definition. The quickest way to obtain the xml file is to use the Shared Services LCM Web interface to select the objects you wish, select Define Migration to pull up the LCM Migration Wizard, and follow the prompts until the last step. Two options are presented, “Execute Migration” or “Save Migration Definition”. Choose “Save Migration Definition” to save the migration definition to a local file.


That is pretty much all there is to it… move the xml migration definition file to the location you have installed LCM. For instance, \Hyperion\common\utilities\LCM\9.5.0.0\bin, open a command line and run Utility.bat as indicated:

E:\Hyperion\common\utilities\LCM\9.5.0.0\bin>Utility.bat SampleExport.xml
Attempting to load Log Config File:../conf/log.xml
2011-03-20 11:50:49,015 INFO  - Executing package file - E:\Hyperion\common\util
ities\LCM\9.5.0.0\bin\SampleExport.xml
>>> Enter username - admin
>>> Enter Password----------
--2011-03-20 11:50:57,968 INFO  - Audit Client has been created for the server h
ttp://hyp13:58080/interop/Audit
2011-03-20 11:50:58,421 WARN  - Going to buffer response body of large or unknow
n size. Using getResponseBodyAsStream instead is recommended.
2011-03-20 11:51:03,421 INFO  - Audit Client has been created for the server htt
p://hyp13:58080/interop/Audit
2011-03-20 11:51:03,437 INFO  - MIGRATING ARTIFACTS FROM "Foundation/Shared Serv
ices" TO "/SampleExport"
2011-03-20 11:51:32,281 INFO  - Message after RemoteMigration execution - Succes
s. HSS log file is in - E:\Hyperion\common\utilities\LCM\9.5.0.0\logs\LCM_2011_0
3_20_11_50_48_0.log
2011-03-20 11:51:32,687 INFO  - Migration Status - Success

E:\Hyperion\common\utilities\LCM\9.5.0.0\bin>


LCM Example: Synchronizing Shared Services Security between Environments

LCM often requires moving objects and security between environments, such as from a development environment to a production environment. While LCM makes it easy, it is not as straightforward as simply running an export from one environment and importing into another environment. The reason is that LCM imports work in a “create/update” mode. In other words, the operations performed in LCM are typically additive in nature. While the typical LCM method would capture new users and new application provisioning, it will not handle removing user provisioning, removing or changing groups, or essentially removing users from the system. This can be an easy oversight, but it will ensure that the security becomes out of sync over time and can cause issues as well as security implications. At a high level, the steps to sync provisioning using LCM would be:

  1. Export Users/Groups/Provisioning from Source Environment
  2. Export Users/Groups from Target Environment
  3. Delete Using Step 2 Results the Users/Groups in Target Environment
  4. Import Users/Groups/Provisioning into Target Environment

Essentially, Step 1 and 4 are the typical import/export operations – where security is exported from one environment and imported into another environment. However, two additional steps are necessary. In Step 3, the users and groups in the target environment are deleted, removing provisioning too. This leaves an empty, clean environment to then import security, ensuring no residual artifacts remain in the environment. To use the LCM delete operation, a list of items to be deleted must be supplied. This is where Step 2 comes in, a simple export of the Users and Groups in the Target environment will provide the necessary information to provide to Step 3 – deleting the respective users and groups.

Below are some sample XML migration definitions for each step:


Step 1 – Export Users/Groups/Provisioning from Source Environment

Note: By default the results will be sent to the source Shared Services server in the “import_export” directory. You can use LCM to redirect the output to keep the results all in the same environment (the target system) by using the command line option [-local/-l] (run utility.bat without any command line options to see help for your version of LCM). Simply redirect the results into the local folder, \Hyperion\common\import_export, in the Target system.

<?xml version=”1.0” encoding="UTF-8"?>
<Package name="web-migration" description="Migrating Shared Services to File System ">
    <LOCALE>en_US</LOCALE>
    <Connections>
        <ConnectionInfo name="MyHSS-Connection1" type="HSS" description="Hyperion Shared Service connection" url="http://sourceSvr:58080/interop" user="" password=""/>
        <ConnectionInfo name="FileSystem-Connection1" type="FileSystem" description="File system connection" HSSConnection="MyHSS-Connection1" filePath="/Step1ExportFromSource"/>
        <ConnectionInfo name="AppConnection2" type="Application" product="HUB" project="Foundation" application="Shared Services" HSSConnection="MyHSS-Connection1" description="Source Application"/>
    </Connections>
    <Tasks>
        <Task seqID="1">
            <Source connection="AppConnection2">
                <Options>
                    <optionInfo name="userFilter" value="*"/>
                    <optionInfo name="groupFilter" value="*"/>
                    <optionInfo name="roleFilter" value="*"/>
                </Options>
                <Artifact recursive="false" parentPath="/Native Directory" pattern="Users"/>
                <Artifact recursive="true" parentPath="/Native Directory/Assigned Roles" pattern="*"/>
                <Artifact recursive="false" parentPath="/Native Directory" pattern="Groups"/>
            </Source>
            <Target connection="FileSystem-Connection1">
                <Options/>
            </Target>
        </Task>
    </Tasks>
</Package>

Step 2 – Export Users / Groups from Target Environment

<?xml version="1.0" encoding="UTF-8"?>
<Package name="web-migration" description="Migrating Shared Services to File System ">
    <LOCALE>en_US</LOCALE>
    <Connections>
        <ConnectionInfo name="MyHSS-Connection1" type="HSS" description="Hyperion Shared Service connection" url="http://targetSvr:58080/interop" user="" password=""/>
        <ConnectionInfo name="FileSystem-Connection1" type="FileSystem" description="File system connection" HSSConnection="MyHSS-Connection1" filePath="/Step2UsersGroupsTarget"/>
        <ConnectionInfo name="AppConnection2" type="Application" product="HUB" project="Foundation" application="Shared Services" HSSConnection="MyHSS-Connection1" description="Source Application"/>
    </Connections>
    <Tasks>
        <Task seqID="1">
            <Source connection="AppConnection2">
                <Options>
                    <optionInfo name="userFilter" value="*"/>
                    <optionInfo name="groupFilter" value="*"/>
                </Options>
                <Artifact recursive="false" parentPath="/Native Directory" pattern="Users"/>
                <Artifact recursive="false" parentPath="/Native Directory" pattern="Groups"/>
            </Source>
            <Target connection="FileSystem-Connection1">
                <Options/>
            </Target>
        </Task>
    </Tasks>
</Package>

Step 3 – Delete Users/Groups in Target Environment

<?xml version="1.0" encoding="UTF-8"?>
<Package name="web-migration" description="Migrating File System to Shared Services">
    <LOCALE>en_US</LOCALE>
    <Connections>
        <ConnectionInfo name="MyHSS-Connection1" type="HSS" description="Hyperion Shared Service connection" url="http://targetSvr:58080/interop" user="" password=""/>
        <ConnectionInfo name="AppConnection1" type="Application" product="HUB" description="Destination Application" HSSConnection="MyHSS-Connection1" project="Foundation" application="Shared Services"/>
        <ConnectionInfo name="FileSystem-Connection2" type="FileSystem" HSSConnection="MyHSS-Connection1" filePath="/Step2UsersGroupsTarget" description="Source Application"/>
    </Connections>
    <Tasks>
        <Task seqID="1">
            <Source connection="FileSystem-Connection2">
                <Options/>
                <Artifact recursive="false" parentPath="/Native Directory" pattern="Users"/>
                <Artifact recursive="false" parentPath="/Native Directory" pattern="Groups"/>
            </Source>
            <Target connection="AppConnection1">
                <Options>
                    <optionInfo name="operation" value="delete"/>
                    <optionInfo name="maxerrors" value="100"/>
                </Options>
            </Target>
        </Task>
    </Tasks>
</Package>

Step 4 – Import Users and Groups into Clean Target Environment

This step assumes that Step 1 was redirected onto the target environment within the import_export directory. The respective folder, Step1UsersGroupsSource, can also be manually copied from the source to the target environment without using the redirection to a local folder technique.

<?xml version="1.0" encoding="UTF-8"?>
<Package name="web-migration" description="Migrating File System to Shared Services">
    <LOCALE>en_US</LOCALE>
    <Connections>
        <ConnectionInfo name="MyHSS-Connection1" type="HSS" description="Hyperion Shared Service connection" url="http://targetSvr:58080/interop" user="" password=""/>
        <ConnectionInfo name="AppConnection1" type="Application" product="HUB" description="Destination Application" HSSConnection="MyHSS-Connection1" project="Foundation" application="Shared Services"/>
        <ConnectionInfo name="FileSystem-Connection2" type="FileSystem" HSSConnection="MyHSS-Connection1" filePath="/Step1UsersGroupsSource" description="Source Application"/>
    </Connections>
    <Tasks>
        <Task seqID="1">
            <Source connection="FileSystem-Connection2">
                <Options/>
                <Artifact recursive="true" parentPath="/Native Directory" pattern="*"/>
            </Source>
            <Target connection="AppConnection1">
                <Options>
                    <optionInfo name="operation" value="create/update"/>
                    <optionInfo name="maxerrors" value="100"/>
                </Options>
            </Target>
        </Task>
    </Tasks>
</Package>

Troubleshooting with Command Line LCM

LCM can be a great tool when it works flawlessly. However, it can quickly become part of mission critical activities like promoting artifacts from development to production. Consequently, it is necessary to learn some troubleshooting skills to maintain business continuity using LCM.

  1. Review the output of the LCM operation. Usually it will provide some detail about the error that was received.
  2. Review the server side Shared_services_LCM.log in ORACLE_HOME\logs\SharedServices\SharedServices_LCM.log
  3. Turn on debugging for the command line LCM tool. Change the line “info” to “debug” in the files
    E:\Hyperion\common\utilities\LCM\9.5.0.0\conf in log.xml and hss-log.xml
    <param name=”Threshold” value=”info” />
  4. Use Google, the Oracle Knowledgebase to search for more information.
  5. Try only a subset of the initial objects. For instance, Essbase can export a number of objects, Outline, Calc Scripts, Rule Files, Report Scripts, Substation Variables, Location Aliases, and Security. Try one at a time to determine which part of the whole is failing.
  6. Restart the environment. LCM is an emerging technology and can sometimes just be in a bad state. I’ve seen countless LCM issues where bouncing the environment clears the issue up.
  7. Look for special characters that might be present in your data. LCM is a java tool and uses xml and text files to transmit data. There are instances where special characters can mess up the parsing.
  8. Look for patches – as mentioned previously, LCM is an emerging technology and is still somewhat buggy (especially older versions). Check release notes in patches for enhancements/bug fixes in LCM.